

You can find them stuffed in drawers or cardboard shoe boxes. They end up in trunks or suitcases, in attics or basements. Sometimes they’re pasted into albums that gather dust on coffee tables. Wherever they end up, they’re often found by family members during a holiday gathering—or while going through a loved one’s things after he or she has passed on.
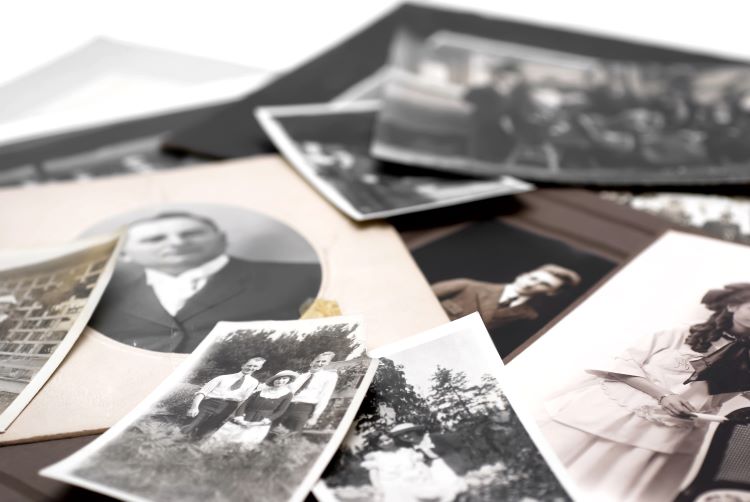
What are they? Old photos. Dozens, maybe hundreds of them, some faded, some torn. But all of them with a story to tell.
Organizing and preserving those old family photos can be a mammoth task. How do you sort through hundreds of photos? How do you make sure they survive for future generations to enjoy? With the right materials and a five-step plan, you can turn those piles of random photos into a family archive for generations to enjoy.
MATERIALS YOU’LL NEED
In order to organize and store old photos so they don’t deteriorate, you’re going to need archival-quality materials like museums and libraries use to preserve photos. Whether you purchase your supplies from an office supply store, a craft store, or an archival supplier, make sure they’re actually archival quality. Some products that claim to be archival quality simply aren’t. Look for folders, boxes, and paper that are clearly labeled “acid-free” and “lignin-free,” and plastic sleeves that have passed the Photographic Activity Test (PAT).
The number of materials you need will depend on how many photos you have to preserve. The best way to organize and store photos is in folders placed inside boxes, but albums work, too. Look for
Letter-sized acid-free, lignin-free file folders
Archival flip-top document storage boxes
Archival polyester or mylar photo envelopes (sized to fit photos you’re preserving)
Soft, graphite pencil (for labeling backs of photos) OR acid-free archival index cards (preferred method for labeling photos)
Clean white cotton or nitrile gloves (for handling photos)
Archival-quality photo albums (if you don’t want to use folders and boxes)
FOLLOW A FIVE-STEP PLAN
STEP 1: COLLECT AND SORT PHOTOS
Designate an area of your home, such as a table or counter, as your “photo processing area.” This space needs to be a clean, uncluttered, low-traffic area where you can sort photos into four piles based on the ABCS system created by Cathi Nelson, founder of the Association for Personal Photo Organizers.
A is for ALBUM or ARCHIVAL
In this pile, place the photos you find precious and definitely want to preserve, whether in folders within an archival box or in an album. This might be a one-of-a-kind photo of your grandmother in her wedding dress or a rare photo of a historical place or event, for example.
B is for BOX
This pile is for those photos you want to keep safe in a box but don’t necessarily consider precious. For example, you might have photos of the guests who attended your grandmother’s wedding and want to keep them because they capture the event.
C is for CAN IT
Place photos that you don’t want to keep—duplicates, bad photos, blurry photos—in this pile.
S is for STORY
Even if a photo isn’t especially good, it might tell an interesting story. For example, you might have a photo that captures your grandmother’s little sister mischievously eyeing the wedding cake. Her hand, as it reaches towards the cake, might be blurry, but the photo tells a lot about what she was thinking in that moment—and what sort of child she might’ve been.
STEP 2: IDENTIFY, LABEL, AND RESTORE
Just because you may know the person in a photo doesn’t mean others will in coming years. It’s important to preserve both the photo and what information you have about it.
IDENTIFY and LABEL
Try to identify the people, places, ages, dates, and events represented in each photo. Experts in photo conservation don’t recommend writing this information on the back of a photo, but if you have to do so, use a soft graphite pencil rather than a pen, and do not press down hard. Better yet, write the information on an acid-free index card, or write it on the plastic sleeve into which you slip the photo. Some albums have space to write information beside each photo, too.
RESTORE and STORE
Old photos aren’t always in the best shape, but many can be digitally restored to erase crease marks, water damage, faded colors, etc. You can try to restore a photo yourself, using software such as Adobe Photoshop, or you can find a service like Fix The Photo to do it.
The American Institute for Conservation of Historic and Artistic Works (AIC) offers some general guidelines for handling and repairing original photos. For example, the AIC stresses that it’s important to wear clean gloves when handling photos, because the oils from your hands can ruin them. Never use tape to repair a torn photo, and never attempt to clean a photo with water- or solvent-based cleaners. Never try to detach a photo from, for example, an old album page or a glass frame; that process is best done by a professional with the right materials. Also, never place photos in magnetic or self-adhesive albums, or in albums that aren’t archival quality.
For photos that were placed in thick paper “frames” by the original photographer, The Family Curator creator Denise Levenick recommends either placing the photo in an acid-free plastic sleeve and then putting it back in the frame, or placing a piece of acid-free paper between the photo and its frame, to prevent the frame from damaging the photo. You can always store the photo separately from the frame, too, especially if the frame is pretty or included printed information that’s important, such as the photographer’s name and location.
STEP 3: PROPERLY STORE PHOTOS
USE ONLY ARCHIVAL QUALITY MATERIALS
Once you’ve unearthed old photos, it’s important to store them in a way that prevents further deterioration and damage. Basically, any material that comes in contact with a photo needs to be archival quality.
When searching in the store or online, make sure the products you buy are marked as “acid-free,” “lignin-free,” and “neutral-PH.” For plastic sleeves, look for those marked as “Passed PAT.”
You can place photos in archival-quality albums, or you can place each photo in a sleeve, and then place that sleeve in an labeled, archival-quality folder. You can place that folder, along with others, in an archival box or binder.
FIND THE RIGHT ENVIRONMENT
The AIC recommends storing old photos in a dry, cool, well-ventilated environment where they’re safe from the heat, humidity, and pests. Attics and basements, therefore, aren’t ideal. In addition, it’s important to store photos, albums, and boxes in places free of light and dust, since they, too, can damage photos.
The AIC cautions against storing photos in glass frames exposed to light for long periods because light can fade or damage photos. The best practice is to make a copy of a photo to keep in a frame, while storing the original in a safe place.
STEP 4: DIGITALLY PRESERVE YOUR PHOTOS
Digital copies of your photos guarantee that the images will be preserved, even if you lose the originals. Plus, digital copies are easy to access and share with others. You have several options for digitally preserving old photos:
STORE THEM TO THE CLOUD
Storing files and photos on a secure cloud-based service means they’ll be available to you even if something happens to your computer. Most services sync with your phone and will automatically upload photos that you have on your phone. So, if you scan an old photo with your phone, or snap a picture of it with your phone, that photo will automatically store on your cloud service. The most popular cloud-based services are iCloud, Google Drive, Microsoft OneDrive, Dropbox, and Amazon Drive or Amazon Photos. The downside of cloud-based services is that you usually have to pay for storage plans.
SCAN PHOTOS
In order to make a digital copy of any photo, you’ll have to scan it first. You can use apps on your phone, like Google PhotoScan, in which you simply hover your phone above a photo to create an image file that stores to your phone or Google Photos.
You can also invest in a scanner that can convert your photos into a digital image that you can then store to your computer or the cloud. Your options here range from a simple flatbed scanner (the least expensive option) that can process one photo at a time, to a high-speed scanner (prices range from $200 to over $500) that can handle multiple photos at a time and allow you to edit, caption, print, and share the photos.
A third option is to send your photos to an online scanning service. For a fee, a scanning service will scan your photos and then send the originals and the digitized copies back to you. As you pick a service, take a look at customer reviews about the company’s service, turnaround times, quality of scans, and its security and privacy policies. Stores such as Walmart, Costco, and CVS also offer digitizing services, too.
STEP 5: SHARE AND DISPLAY YOUR PHOTOS
Sharing photos with family members can stir memories, add to a family history, and enhance relationships within families.
SHARE FOLDERS
Set up a folder on a file-sharing site like Google Drive, Dropbox, or Microsoft OneDrive, then allow family members to access that file. If you want them to contribute their own photos to the file or add information to an image, give them “editing” privileges, too.
USE A DIGITAL PHOTO FRAME
Digital photo frames allow you to upload a number of photos, and the display rotates through those photos. Having one in your home allows not only you, but also your guests, to view images connected to your family history. Such frames also make great gifts, and you can always update the photos with new ones sent via your phone.
CREATE A BOOK
Sometimes, the photos alone aren’t enough. Instead, you want to compile some stories or other artifacts along with the photos. One way to do this is to create a book that includes photos, anecdotes, memories, recipes, artwork, letters, etc. You can create the book yourself by using a service like Shutterfly, in which you upload your images, design your pages with easy-to-use tools, and pay for printing.
CREATE POSTERS, COLLAGES, ETC.
Photo printing sites like Shutterfly or stores like Staples and Walgreens also offer other ways to turn old photos into displays or gifts. You can create posters and other wall art, pillows, blankets, t-shirts, mugs, dishes, and so much more—all with the images you choose to put on them.
SHARE ON SOCIAL MEDIA
Posting old family photos on social media is a great way to share them with a wider audience than just family members. However, be sure to get permission from anyone who is in the photo—and still alive—before you post. It’s not okay to share someone’s name, face, and information about them unless you have his or her permission.
DONATE TO HISTORICAL COLLECTIONS
If you have some particularly historic photos, then local museums, libraries, historical societies, or universities might be interested in adding them to their collections. Photos of historic events, important townspeople, notable buildings, old downtowns or neighborhoods, etc. can be of interest to such institutions. You can make copies of your photos to keep, then turn over the originals so they’re properly restored, archived, and displayed for many to learn from and enjoy.